
Sourdough starter is a magical ingredient in the world of baking, known for its ability to leaven bread naturally. To dehydrate sourdough starter in an air fryer opens up a realm of possibilities for bakers, allowing for long-term storage and easy reconstitution when needed. The process involves utilizing an air fryer, a versatile kitchen appliance that can be repurposed for dehydrating with ease. With these simple steps, you can preserve your sourdough starter’s vitality and flavor for future delicious creations.
Preparing the Starter
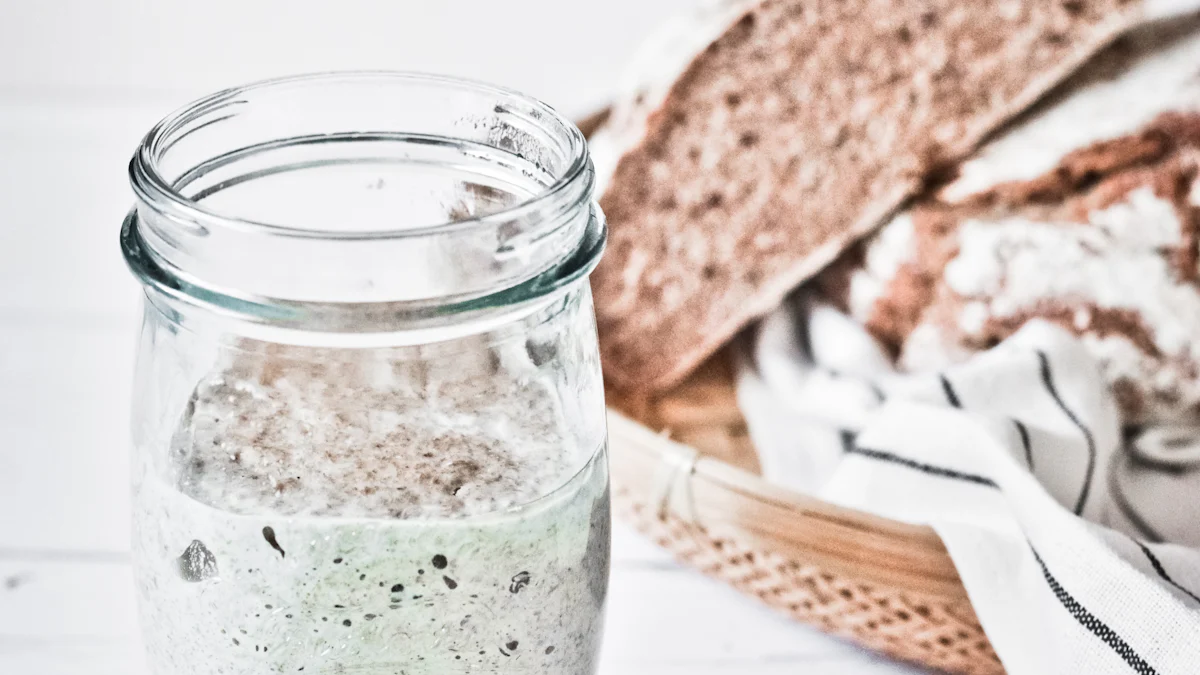
When activating the starter, it’s crucial to ensure that it’s vibrant and ready for the dehydration process. Begin by feeding the starter with a blend of flour and water, allowing it to ferment and bubble up. This step is essential as it kickstarts the yeast activity, ensuring a lively sourdough base. After feeding, check for activity by observing bubbles forming on the surface. These bubbles indicate that the yeast is active and ready to be dehydrated.
Now onto setting up the air fryer. Choosing the right temperature is key to successfully dehydrating your sourdough starter. Opt for a low temperature setting to gently dry out the starter without overheating it. This slow process preserves the beneficial microbes within the starter, maintaining its baking prowess. Next, prepare the parchment paper by cutting it to fit your air fryer tray. The parchment paper acts as a non-stick surface, allowing easy removal of the dehydrated starter once it’s ready.
Dehydrating Process
Spreading the Starter
To begin the dehydrate sourdough starter in air fryer process, start by spreading the active starter onto the parchment paper. This step is crucial as it allows for even drying and ensures that the starter reaches the desired consistency. When spreading the starter, remember to use a thin layer technique. This technique helps in speeding up the dehydration process by increasing surface area exposure. By spreading thinly, you enable efficient moisture evaporation, leading to quicker drying times.
Once you have applied the thin layer technique, focus on ensuring an even spread of the starter across the parchment paper. A uniform spread guarantees consistent drying throughout the entire batch. This step is essential to avoid any areas being under or over-dehydrated. By taking your time to evenly distribute the starter, you set yourself up for successful dehydration and storage.
Monitoring the Dehydration
As your sourdough starter begins to dehydrate in the air fryer, it’s vital to actively check progress periodically. Observing how the starter transforms during dehydration allows you to adjust if needed and ensures optimal results. Keep an eye on its texture and color changes as it dries out gradually. This monitoring process helps you gauge when the starter is ready for storage based on its appearance and feel.
While checking progress is essential, it’s equally important to avoid overheating during dehydration. Maintaining a low temperature setting prevents overheating, which can harm the beneficial microbes within your sourdough starter. By dehydrating at a gentle heat level, you safeguard these vital components that contribute to your baking success. Avoiding overheating preserves the integrity of your dehydrated starter for future use.
Final Steps
After successfully dehydrating your sourdough starter in an air fryer, it’s time for crumbling and preparing it for storage. Gently break apart the dried-out sheet of starter into smaller pieces or crumbs using your hands or a kitchen tool. Crumbling facilitates easier blending and reconstitution when needed for baking projects down the line.
Once crumbled, consider blending your dehydrated sourdough starter before storing it away safely. Blending ensures a consistent texture throughout and makes rehydration more manageable when you’re ready to revive your sourdough culture. Blend until you achieve a granular consistency suitable for long-term storage in an airtight container.
Storing and Using Dehydrated Starter
Proper Storage Methods
To store your dehydrated sourdough starter effectively, consider utilizing airtight containers. These containers provide a secure environment that shields the starter from moisture and external contaminants, preserving its quality for extended periods. By sealing the dehydrated starter in an airtight container, you safeguard its integrity and ensure it remains viable for future baking endeavors.
When aiming for long-term storage, adhere to these essential tips to maintain the longevity of your dehydrated sourdough starter. Firstly, store the airtight container in a cool, dry location away from direct sunlight or heat sources. This optimal storage condition prevents any potential rehydration due to moisture exposure. Additionally, periodically check on the stored starter to ensure it maintains its dry consistency and doesn’t show signs of moisture buildup.
Rehydrating the Starter
Embarking on the journey of rehydration involves a step-by-step process that revives your dehydrated sourdough starter back to its active state. Initiate the rehydration by preparing a mixture of water and flour in a clean container. Gradually introduce small amounts of water to the flour until you achieve a thick paste consistency. This gradual incorporation allows for proper hydration without overwhelming the dormant yeast within the dehydrated starter.
As you progress through the step-by-step rehydration, monitor the mixture’s texture closely. The goal is to attain a smooth and elastic dough-like consistency that indicates successful reactivation of the sourdough culture. Be patient during this process as it may take some time for the dormant microbes to awaken and begin fermenting actively again.
Signs of a Ready Starter
Identifying when your rehydrated sourdough starter is ready for use involves recognizing specific indicators that signal its readiness. A ready starter exhibits visible signs of fermentation activity, such as bubbling and expansion in volume. These visual cues indicate that the yeast within the starter has been successfully revived and is actively fermenting, ready to leaven your baked goods effectively.
Moreover, pay attention to the aroma emitted by your rehydrated sourdough starter. A pleasantly tangy scent reminiscent of fermented dough signifies that the yeast culture is thriving and producing desirable flavors characteristic of sourdough bread. Trust your senses when assessing these olfactory cues as they provide valuable insights into the vitality and readiness of your reactivated starter.
Using the Rehydrated Starter
Once you have successfully rehydrated your sourdough starter, explore various ways to incorporate it into your baking endeavors creatively. Begin by experimenting with baking recipes that call for active sourdough culture as a leavening agent. The revived starter adds depth of flavor and complexity to bread, pancakes, waffles, or even pizza crusts, enhancing their taste profiles significantly.
In addition to baking with your rehydrated starter, prioritize maintaining its health and vigor for long-term use in future culinary projects. Regularly feed and nurture your active sourdough culture by discarding a portion and replenishing it with fresh flour and water at consistent intervals. This feeding regimen sustains the yeast population within the starter, ensuring its continued viability over time.
Recapping the dehydration journey, the sourdough starter transforms into versatile flakes ready for long-term storage. The benefits of having a dehydrated starter are evident in its quick reconstitution and robust activity, as shared by dedicated bakers. Encouragement is extended to all aspiring bakers to embark on this rewarding process, ensuring a constant supply of vibrant sourdough culture for future baking adventures.
Post time: May-31-2024